Germans of the American Revolution

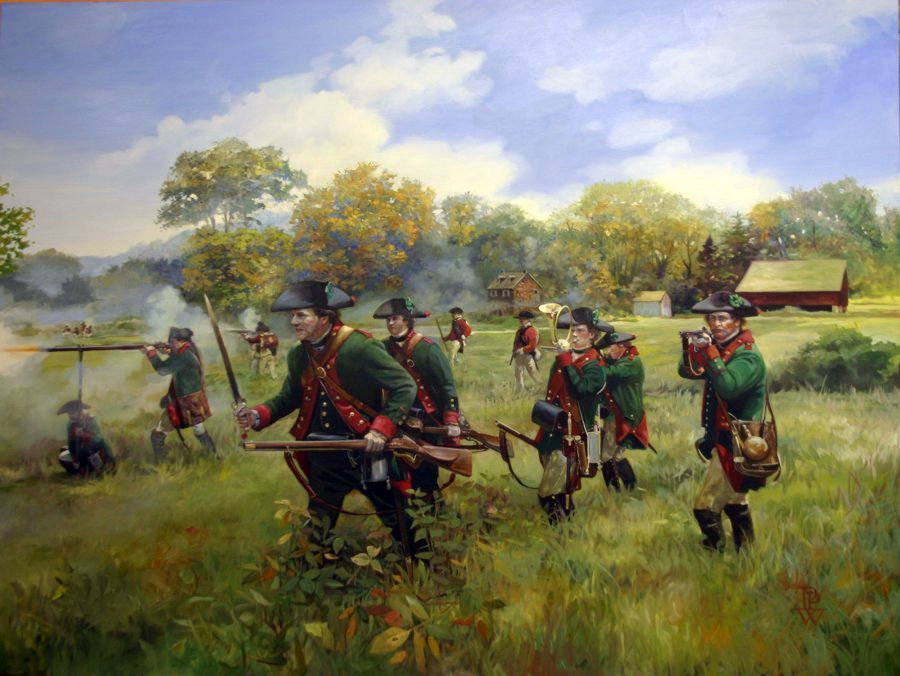
When one mentions the American Revolution, people tend to think of Americans fighting British soldiers for their independence. Some may add Loyalists into the equation, French allies, and Native American tribes. One of the “supplemental” forces, however, is the go-to for many Americans – the Hessians.

So who are the Hessians? To understand these German mercenaries, we must dive into the British monarchy at the time of the American Revolution and its relationship with Germany.

The Hessian Jägerkorps in New York and Pennsylvania, 1776-1777 ...
Hessian Jagers at the Battle of Brandywine, 1777

King George III of England was not actually British, but a descendent of kings from Hanover. True, George III was born in Great Britain, but he still retained the crown of Hanover and both his father and grandfather, Georges II and I respectively, were born in Germany. Because of their Hanoverian lineage, the Georgian monarchs commanded the armies of Hanover as well as attracting support from many other German states. Hanover itself played little to no role in the revolution, simply taking over garrison duties from British regulars during and after the Siege of Gibraltar.

Since the Germans were on good terms with George III, many were willing to take up arms with the British in the revolution. Unfortunately, history has labelled them as “Hessians” when in reality, the units dispatched across the Atlantic were a diverse group of Germans. Hesse-Kassel made up the largest amount of these units, 16,000 troops, while Hesse-Hanau provided about 2,500 troops. Hesse-Kassel was renowned for renting its soldiers to foreign powers in order to generate a steady profit. This region had the highest percentage of its population in the military at the time, even more than the traditionally militaristic Prussian Empire.

Wilhelm Knyphausen (Hessian General) (1716 - 1800) - Genealogy
Baron Wilhelm von Knyphausen, arguably Hesse-Kassel’s finest commander in America.

Brunswick-Wolfenbuttel sent almost 6,000 men to America as their heir to the throne, Charles William Ferdinand, was married to the sister of George III. The Brunswickers had a treaty with Britain at the time and earned compensation for the dead and wounded.

Ansbach-Bayeruth sent 2,500 total soldiers in a desperate attempt to climb out of debt, which Margrave Charles Alexander had fallen deeply into. Though he earned a solid amount from the British crown, Charles Alexander was so far gone that he sold his own country to Prussia to escape debt, later moving to Britain where he lived out the rest of his days. Waldeck sent 1,000 troops to the war effort while around 600 soldiers from Anhalt-Zerbst were sent to garrison New York City and Quebec.

CharlesAlexanderBrandenburgAnsbach.jpg
Alexander, Margrave of Ansbach-Bayeruth, who sold his own country to escape crippling debt.

Now it’s time for some math. About 28,500 Germans saw service in the American revolution. Combining the two Hessian territories of Hesse-Kassel and Hesse-Hanau, we get 18,500 soldiers who can actually be called “Hessians.” This constitutes just about 65% of German troops who fought in the American Revolution. While Hessians were a minority, they were by no means the sole German representative!

Book Review: The Last Battle

Peter Hart’s new book, The Last Battle, is a study of the concluding months of the First World War. Beginning at the Meuse-Argonne Offensive, Hart takes readers through the dying days of the war and reveals its ferocity and brutality even with hours before armistice. I was wildly impressed with this book and enjoyed it much more than I originally thought.

Praise:

Hart’s use of quotes is fantastic and there is rarely a page without one. The large number of quotes paint a great picture of the soldiers’ experiences. Many of the quotes are from British troops, but it includes a number of Commonwealth troops. American, French, and German perspectives also add to the book. Since Hart is an oral historian, he knows how to use quotations perfectly in his books. If you have read Gallipoli, you will not be dissapointed. here are a few maps included of certain battles as well as an overview of Flanders in Sept. 1918. Hart includes the sectors of each individual army and breaks it down by division. Chapter 1 is very useful since it reviews the effects of Operation Michael (Kaiserschlacht) on the Western Front. A casualty list gives readers an idea of how costly this war has proven. A lot of people would assume this book is about the infantry. The book includes a large number of sources from artillery and air units, including vivid descriptions of dogfights and devastating air crashes. This book gives you a feeling, something not many history books do. When you know a war is drawing to an end, each lost life you read about hurts just a bit more. Men die with weeks, days, hours, even minutes before peace. It feels horrible when you know somebody is so close to being safe and returning home to their mothers, wives, and children.

Criticism:

I have little criticism about this book, but the main thing is the lack of German or French sources. There are a decent number, but a few more wouldn’t hurt at all. The maps were VERY confusing at first thanks to complex objective lines, but there’s a key so it’s not as bad as it sounds.

Rating:

5/5

The War of Bavarian Succession

The common theme of “Wars of Succession” in the 18th century affected Spain, Austria, and even Poland. However, the War of Bavarian Succession (1778-79) is widely overlooked by most. It did shape the basis for Napoleonic Central Europe in the upcoming years of turmoil on the Continent.

The Austrians had suffered defeat in their own War of Succession in the 1740s, but Maria Theresa still kept her throne. One of the main parts of Austrian lands they lost was Silesia, a strip of modern-day Poland which belonged to Prussia. When Maria Theresa gave up her title as Holy Roman Empress, the throne passed to her son Joseph II, who wanted to revive Austrian influence in Germany. His reforms of the Austrian military cast a shadow over his reign, as many Austrians were filled with discontent. The situation in the Empire was tense: they wanted to restate their claim as the most important German nation and also reclaim land lost in the Seven Years’ War and War of Austrian Succession.

Image result for bavarian succession
Prussian soldiers circa 1778

In December of 1777, the Elector of Bavaria, Maximilian III, died and caused a power vacuum akin to previous problems of succession. Charles Theodore became the new ruler and ceded Bavaria to the Austrians in exchange for the Austrian Netherlands. Joseph II’s pressure on Charles caused the deal to go through, much to Prussia’s disgust. Prussia backed Charles August, Duke of Zweibrucken, and countered the Austrians. When Imperial troops occupied Bavaria, Frederick II declared war. Joseph II led his troops against the Prussians, but no real engagements were fought. Most were simple supply raids through the winter, which led the war to be known as either the “Potato War” or the “Plum Scrum.” Many soldiers on both sides died of starvation in the frigid winters or of diseases which ravaged camps. The Austrians and Prussians lost a combined 39,000 men and 5,000 horses in a war with no major battles.In May of 1779, the aging Maria Theresa intervened, as she was still ‘King’ of Bohemia and Hungary (the throne was legally supposed to be occupied by a man). She organised a separate peace with Frederick, and the war came to a close. Charles Theodore was kept on the throne of Bohemia but Austria would renounce her claims to Bavaria.

HMS Macedonian vs USS United States

Painters have a fascination with the ocean. Monet’s “La Terasse de St.-Adresse”, Gericault’s “Raft of the Medusa”, and Turner’s “The Fighting Temerarie” all illustrate the sea’s crashing waves, ships tossing about, and the serenity of the water. Some paintings are of war, and the combination of these two themes create masterpieces. This painting, by Thomas Chambers, is “Capture of H.B.M Frigate Macedonian by U.S. Firgate United States, October 25, 1812.” It is time to explore both the art and the history behind Chambers’ piece.

Capture of H.B.M. Frigate Macedonian by U.S. Frigate United States, October 25, 1812

The painting is in the Smithsonian American Art Museum in Washington D.C. on a wall in the second floor corridor. Painted in 1852, the image shows a duel between HMS Macedonian and the USS United States, early in the War of 1812. First we must understand the background to the piece. The War of 1812 began on the seas as the US and Britain became involved in a series of disputes over impressment. The United States’ claims to parts of Canada and the Franco-American sympathies helped turn the tide and war was declared in 1812. The USS United States was the first American frigate ever built, ordered in March of 1794. The ship’s captain, Stephen Decatur, allegedly made a bet with the commander of the Macedonian, John Carden, in Norfolk, Virginia. If the two were to meet in battle, Carden owed Decatur his beaver-felt hat. The United States was sent to patrol North Africa where it came into contact with the Macedonian off the Azores.

USS United States had a strong advantage over HMSMacedonian in its firepower. Most of the United States’ guns were 24-pounders, while HMS Macedonian was equipped with primarily 18-pounders. The United States also had six more guns and was a larger, more-powerful ship. The United States‘ broadsides riddled the British frigate at a long range and demasted the ship. Carden surrendered his ship after suffering some 100 casualties. The Macedonian was the first British ship to be bested by an American ship and the first to be returned to an American port (Newport, Rhode Island). HMS Macedonian was recommissioned as USS Macedonian and served until 1824.

Carden and the Macedonian

The close-up above shows Capt. John Carden of HMS Macedonian announcing his surrender to the United States with a loudhailer as the American ship fires a broadside into the Macedonian‘s hull. The sails next to him are covered in holes from the shot. It is important to note the damages around the ship as the USS United States fired about seventy broadsides. Chambers’ painting shows the ship in a much better state than it would have been. Many of the crew on both side are on deck, but on the United States, they would have been below decks firing the broadside illustrated.

USS United States

The whisps of smoke are my favourite part of this painting. Think how difficult it is to paint smoke and even show the wooden hull behind it. The American crew cheers from the deck and further to the right stands Decatur, responding to Carden over the roar of the cannon. Notice how the American ship is in the light of victory. Chambers was born in England, but moved to the United States where he would paint this in 1852. It is interesting to see where his loyalties lie.

While this painting is not as famous as “The Coronation of Napoleon” which I previously reviewed , it is still a very intriguing painting as it shows the different aspects of naval combat and the differences between each nation’s ships in one of the first naval engagements of the War of 1812.

Brief History of the Croatian War of Independence

Image result for croatian war of independenceRelated image

1990- SAO Krajina formed

July 1991- Independence

August 1991- Vukovar

Sept. 1991- Battle of the Barracks

Oct. 1991- Dubrovnik

Oct. 1991- Zagreb TV bombed

Nov. 1991- Vukovar massacre

1992- UN intervenes

Jan 1993- Operation Maslenica

Sept 1993- Operation Medak Pocket

1994- Siege of Bihać

1995- Operation Flash

1995- Zagreb attacked

Aug. 1995- Operation Storm

Nov. 1995- Erdut Agreement

Bernardo O’Higgins: Chile’s Finest General

O’Higgins was born on August 20, 1778 to an Irish father and a Spanish mother. His father, Ambrose, was elected Prime Minister of Chile in 1788, paving the way for his son to become an important figure in Chile’s history. Bernardo left for Peru to attend college, later travelling to England and Spain. By 1801, he returned to Chile after his father’s death. When he returned, he became involved in politics and was a key member of the nationalist movement.

Image result for bernardo o'higgins
Bernardo O’Higgins

In 1808, Spain was in turmoil as French armies swept through the country. Seeing their opportunity, many South Americans rose up against imperial rule. Two years later, politicians in Santiago announced independence and elected new leaders of the rebelling nation. The initial process was peaceful, as Chilean nationalists did not bother with relations to the Viceroyalty of Peru (one of Spain’s two American colonial regions). However, Spain returned with force in 1814 and attempted to reclaim Chile and other rebellious nations. At the Battle of Rancagua on Oct 1-2, Bernardo O’Higgins led Chilean troops against veteran Spanish forces of the Napoleonic Wars. O’Higgins was crushed. Without reinforcements from Santiago, the Chileans suffered some 1,000 casualties out of an initial force of 2,000. This battle marked the beginning of the Reconquista of America.

Image result for battle of maipu
The Battle of Chacabuco

O’Higgins fled to neighbouring Argentina where he and Argentine nationalist, Jose de San Martin, began forming a new army. In January 1817, the two returned to Chile with their new force, the Army of the Andes. San Martin’s tactical genius and O’Higgins’ decisiveness won the Battle of Chacabuco. The Battle of Maipu was on April 5, 1818 near Santiago. The 5,000-strong Army of the Andes attacked Manuel Osorio’s Spanish force. Using his grenadiers and cazadores to his advantage, O’Higgins countered Spanish attacks while San Martin attacked with the main force and artillery. The victory at Maipu is viewed as the decisive battle for Chile’s independence.

Image result for battle of maipu
O’Higgins (left without the bicorne) speaking with San Martin at the Battle of Maipu

O’Higgins went on to create the Chilean Navy later that year, as well as becoming the leader of Chile itself. While in power, he tried removing power of the oligarchy, but failed to do so. Regular attacks on Spanish Royalists and other supporters tainted his reign, as his campaigns became known as the Guerra de Muerte. O’Higgins abdicated in 1823 after losing popular support, and was exiled to Argentina. Years later, O’Higgins and his family were allowed to return but cardiac issues caused him many problems. He became an avid supporter of the navy and colonization before his death in 1842. His last words were “Magallanes…magallanes” which showed his pro-colonisation ideals. Chile did control the Strait of Magellan later on after his death.

O’Higgins is revered in Chile to this day. Massive celebrations occurred on the bicentenary of his birth in 1978, and a Chilean football team is named in his honour. While not as remembered as Bolivar, O’Higgins was an advocat of Latin American independence, one of Chile’s most important founding fathers, and a bold general to be remembered.

“We Shall Enter it With Soil Saturated In Blood” : The Six Day War

Israel and the surrounding Arab nations had major tensions since its founding in 1948. The small Jewish state constantly clashed with the other surrounding nations and especially the Palestinian refugees in the Gaza Strip. After two previous wars, Israel and the surrounding nations were on the brink of yet another armed conflict.

While tensions rose, Egyptian president Gamal Abdel Nasser ordered his military to mobilise to attack neighbouring Israel on May 14th, 1967. Egypt’s ally, Jordan, mobilised around the same time at the order of King Hussein. Syria committed itself to the Arabic triumvirate, and so, Israel was surrounded by enemies.

Image result for six day war tanks
Israeli Centurion tanks

After a vote by the Israeli government, the IDFl quickly attacked an off-guard Egypt in a massive preemptive strike in the Sinai, named Operation Moked. On June 5, Israeli pilots destroyed a massive amount of Egyptian fighter jets before they could take off from the runways of air bases. Some 300 Egyptian fighters were destroyed and the IDF struck at Syrian and Jordanian air bases in a similar manner The Sinai front was opened, and the Egyptian army panicked without any air support. Israeli Centurions rolled into the Sinai and at the Battle of Abu-Aelia, wiped out any enemy resistance. The IDF reached the banks of the Suez canal in a mere four days.

With the Sinai secured, Israel turned its attention quickly to news from the Syrian front, as enemy troops were pressing onto Jerusalem. Col. Motta Gur’s 55th Parachute Brigade was ordered to defend the city while more troops could be sent to aid them. Early on June 6th, the paratroopers slashed their way through Jordanian positions at Ammunition Hill, suffering over 200 casualties. Another battalions fought their way in and around the Rockefeller Museum, suffering greatly at the hands of Jordanian machine guns. Moshe Dayan, the Israeli commander planned to take the Jordanian positions the next day. Uzi Narkiss, and IDF officer, said that Jerusalem hadn’t been taken from the east since King David. Dayan cooly replied “then this will be the second and last time.” On the 7th, Gur charged the Temple Mount and captured it quickly. An Israeli soldier raised his flag on top of the Dome of the Rock, but was ordered to remove it. Israeli troops celebrated. Jerusalem was theirs.

Image result for six day war
Israeli Paratroopers in Jerusalem

IDF reinforcements quickly attacked the West Bank of the Jordan, catching King Hussein’s weary army off-guard. North of that, Israeli troops tried holding off against a massive attacking force of Syrian troops streaming up the Golan Heights. After days of brutal fighting, the Israelis emerged victorious on June 9th with the help of their air superiority. Israel took staggering losses, with 115 confirmed dead on the Golan Heights. Overall, they had suffered some 3,000 casualties.

Israel could have easily pressed on, crippling the three Arab nations , but decided to broker for peace. On June 19th, the nations met to discuss peace, and Israel retained the Sinai, the Golan Heights, the West Bank, and the Gaza Strip. In August, the Arab nations met in Khartoum, Sudan, and decided that they would no longer agree to any peace terms with Israel and would be aggressive in future endeavours towards the nation.

Historical Field Trip: The First Day at Gettysburg

The Battle of Gettysburg was the largest battle fought on American soil and the turning point of the American Civil War. The small farm town in Pennsylvania erupted into a clash between hundreds of thousands of Union and Confederate soldiers. Many people simply known of the famed “Pickett’s Charge” on July 3rd or the fighting at Little Round Top on July 2nd. The day before was even more vital to the battle than the others, organizing positions, creating command problems, and yielded a massive amount of casualties.

1. Buford’s Cavalry

Brigadier General John Buford, commanding the Union’s 1st Cavalry Division ran into Henry Heth’s division early on July 1st and began to delay their advance while awaiting reinforcements. Gamble, Devin, and Merritt held off attacks by Archer’s brigade while Buford surveyed the land. Holding their position on McPherson’s ridge, the Union cavalry desperately put up a fight against the Confederate infantry streaming down the Chambersburg Pike. Look at Buford’s statue along the road as he looks up the road with his field glasses. One of the four cannon barrels at his feet has a small plaque showing that it fired the first shot of the battle.

2. “For God’s Sake Forward!”

Finally at about 9:30 in the morning, Buford’s weary cavalry saw the flags of James Wadsworth’s division of John Reynolds’ 1st Corps from the South. The cavalry dropped back as the infantry sped into the gap to repel the Confederates. Davis’ brigade arrived and placed even more pressure on the Union. General Reynolds ordered forward the legendary Iron Brigade, an elite unit of troops from Michigan and Wisconsin. The brigade hurled themselves against Archer’s brigade in Herbst Woods. Reynolds was struck by a Confederate bullet and fell off his horse. Abner Doubleday replaced the dead general. Trek up Reynolds Avenue and find his marker on the edge of the woods. The Pennsylvania native lends his name to the woods now, as many refer to it as Reynolds’ Woods. The Iron Brigade’s memorials are on the other side of the woods.

Monument on the spot where Reynolds fell. He is buried in Lancaster, PA.

3. The Railroad Cut

While the battle for Herbst Woods raged, three Union regiments rushed to cover their flank on the other side of the Chambersburg Pike. As Mississippians and North Carolinians under Davis slid down into an unfinished railroad bed, the Union troops charged their positions. Suffering one casualty for every foot they advanced, the troops were presented with a murderous Confederate fire. The 6th Wisconsin of the Iron Brigade, which had separated from the rest of its brigade, jumped into the cut and a fierce hand-to-hand battle ensued until the Confederates fell back. The railroad is now complete and operational, but is hardly ever used. You can go into the cut from the side. Feel free to charge down like the Union troops and when you’re in there, look at how exposed the Union troops were to volleys from the defenders.

The Railroad Cut

4. Oak Ridge

Continue north towards the metal observation tower. This is Oak Ridge where Union forces were pushed back by Gen. Richard S. Ewell’s Corps. Edward O’Neal and Alfred Iverson’s brigades attacked Doubleday’s Corps along the hill on what is now Doubleday Avenue. Robert Rhodes’ Confederate division continued to pound Union forces here until about 5 PM when the Union centre collapsed under constant attacks from Brockenborough, Pettigrew, and Scales. Doubleday gave up the defense of the ridge and rushed back towards Cemetery Ridge. Climb the tower to get a view of the Union positions on the hill and back towards the center of their lines.

View towards the town from Oak Ridge. This is the Confederate point of view as they marched to the town of Gettysburg.

5. Barlow’s Knoll

A young Union division commander, Francis Barlow, placed his troops along a small hill jutting out from their lines. These were the lead elements of Oliver Howard’s XI Corps made up of mostly Polish and German immigrants from Ohio and Pennsylvania. Rhodes sent Doles’ brigade north to fight them, as Barlow’s division was too far forward to be supported. Hays and Gordon’s brigades slammed into Barlow’s position and the Union brigades routed under pressure from the attack. Francis Barlow was wounded and paralysed from the legs down as his troops streamed through the town of Gettysburg. Left on the battlefield, Barlow needed help until Gen. John Gordon spotted him. Gordon got Barlow a litter and helped tend to him and the two would become great friends after the war finished.

Union guns had a stellar position on top of Cemetery Ridge

6.Cemetery Hill

Union troops fell back through Gettysburg as the Confederates chased them. Howard’s XI Corps found a position on Cemetery Hill by the Evergreen Cemetery but still struggled to organize a solid resistance to Ewell’s Corps. The timely arrival of Winfield Scott Hancock’s II Corps provided much needed assistance for Howard and the Union managed to form a solid defensive line. Hancock took position on the hill while Howard drifted towards Culp’s Hill. Cemetery Ridge would mark the center of the Union line for the rest of the battle.